Tuesday, May 31, 2011

A Journal for an Artiste

Hello everyone!  I am so excited about this project - for two reasons - it's a first time I've ever made a journal and secondly, I'm guest blogging today (Wednesday at A Place To Be Happy featuring this project.  I am so grateful to Leslie for letting me having a moment at her busy busy blog.  She makes some really fabulous projects and I can only hope her regular viewers are impressed!


With no further adieu, here it is!  This project for a dear friend whose daughter is turning nineteen in a few weeks.  I put together a journal for Iesha.  She's a pretty talented young woman who likes to write poetry and she also has a fantastic voice.  This girl can sing! 


I used Cinch book boards to make this journal.  It's a 8 1/2 x 11 book.  I covered it with pink paper and then Announce paper by 7gypsies using gloss Modge Podge for paper.   Iesha's name is spelled out using chipboard letters that I've had in my stash.  I used hot glue to adhere the letters because I imagine this journal is going to get a bit of wear and tear and I wanted to make sure they would stay on the cover.  The girl is cut from the Cricut Forever Young cartridge and the flowers and white flourish are also from my stash.  


The inside of the front panel are the lyrics from the song "Dance with my Father" by Luther Vandross.  This is Iesha's favorite song so I wanted to include it.    


The next page is made up of card stock covered by a clear cardstock with a flourish design.  I stitched them together with my Sew Easy and then added a frame at the top of the page for her father to include a small picture of her, again stitched to adhere it to the page.  I found the frame in the Make the Cut gallery and was able to find some scraps that were big enough to use to cut it out.  I printed the sentiment "Portrait of the Artist as as a Young Woman" on my computer and just cut it out in rectangles. 


The next side of the frame page is something my friend wrote for his daughter.  He also dabbles in poetry, and I thought it was important that he include something of himself in this gift to her.  I added a few peace sign stickers that I picked up at Michael's recently.


I wanted to include dividers for the journal and I wanted them to be useful so I decided to include pockets for Iesha to stash notes in.  I created the pocket by welding a wave and a rectangle image from the Cricut Plantin Schoolbook cartridge with a treble clef I found on the Quarter Note cartridge.  I used the treble clef's shadow image for welding, and cut out the regular image and in pink and placed it on top.  I then stitched the pocket to the page and included three paper clips with cute sentiments on them.  They are made by 7Gypsies and I love them.  


The other side of the pocket divider is simple - just the word Create cut from the Home Decor cartridge, and another Jolee flower from my stash.


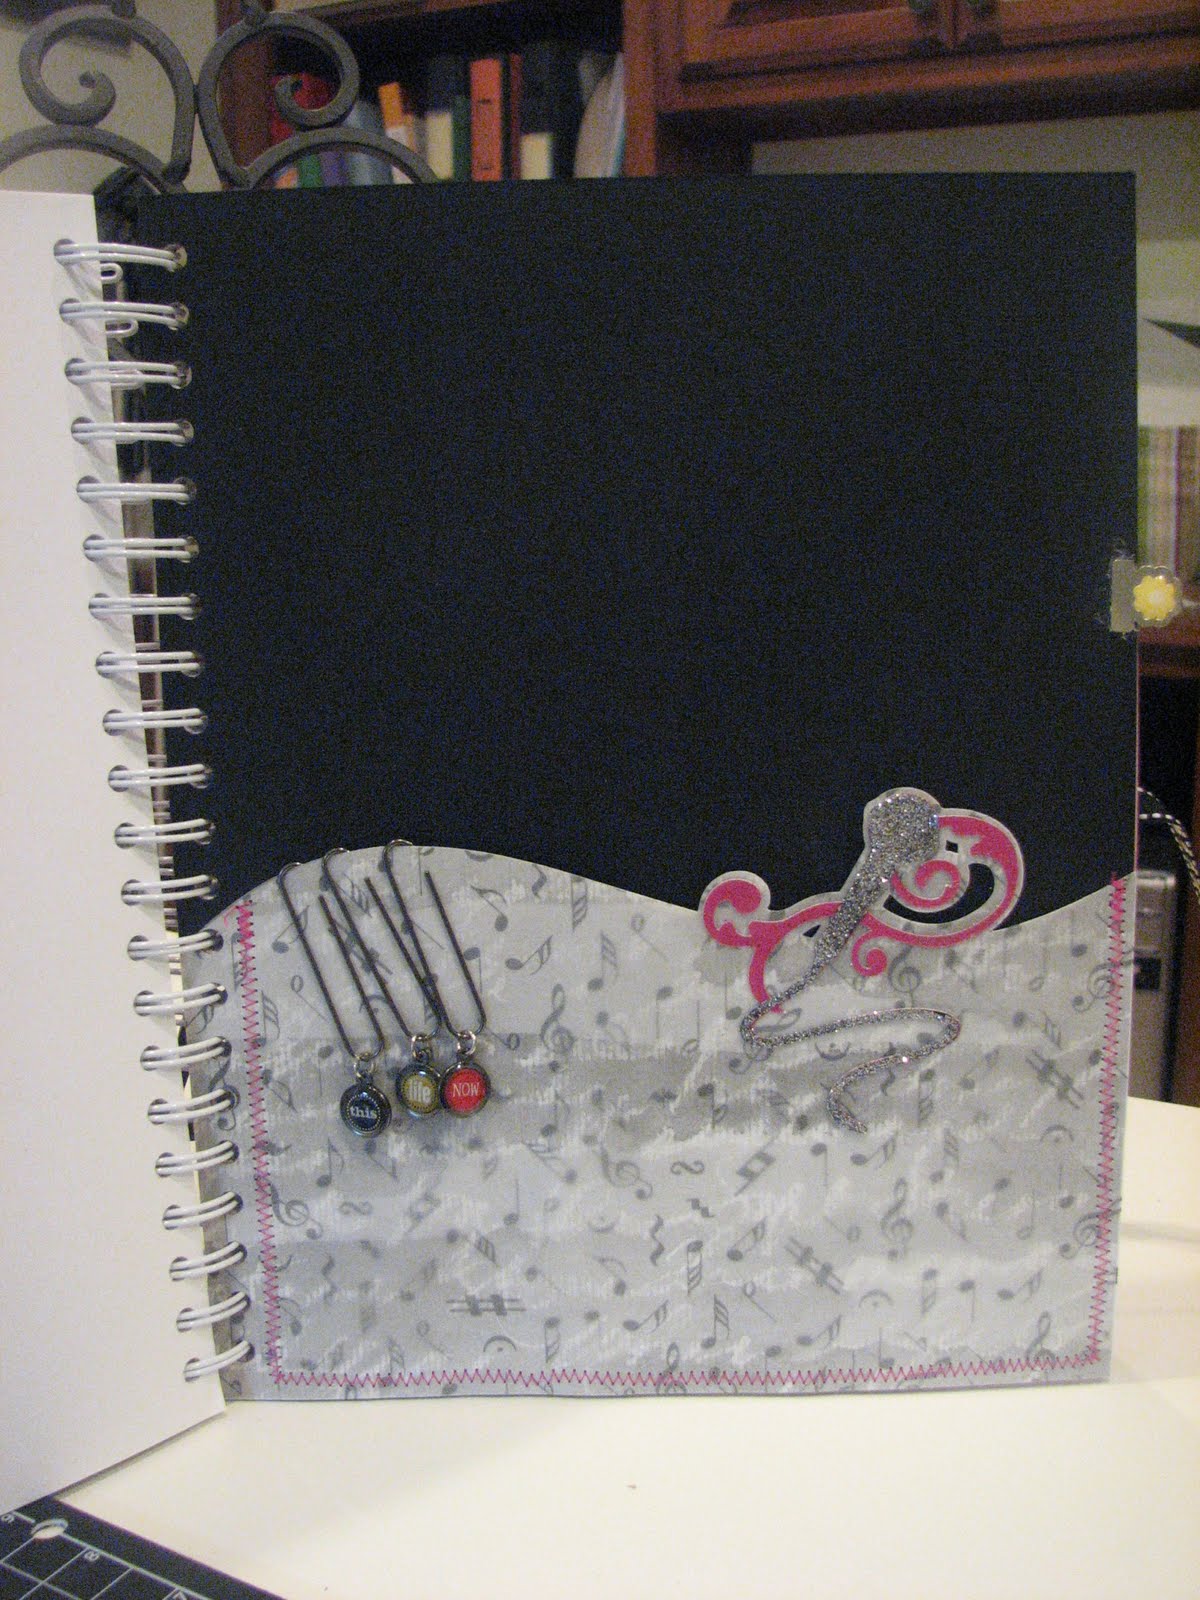
The next pocket page divider uses the same wave and rectangle but this one is welded to the shadow of a music note, also found on the Quarter Note cartridge.   I placed a popsicle stick in the page so you could actually see the pocket.  The paper clips are again made by 7gypsies.


Serendipity was cut from the Graphically Speaking cartridge.  This is one of my all time favorite cartridges.  I almost always find something on that cartridge to use on a project this big.


This is the last pocket page divider.   The microphone is also from Quarter Note.  I welded the shadow to the pocket and cut the microphone out of white paper and then applied adhesive and Martha Stewart glitter.  I think it looks pretty cute.  One thing I forgot to mention is that I did include tabs on the side of the dividers - that way she can easily flip to the different section of the journal.   There is more stitching around the pocket, and of course, more 7gypsies paper clips.


The other side of the pocket page is again something simple - "Explore" is cut from the Home Decor cartridge and accented by several different flowers from my stash.


This is the inside of the back panel.  I used the same 7gypsies paper, but the other side has some color to it.  I  added one of my favorite stamps from the Stampin' Up Word Play set.  It says, "Go Confidently In The Direction of your Dreams".  Not bad inspiration for an aspiring artiste, don't you think?  I added a piece of ribbon covered with a button from my stash to cover up the adhesive.  This ribbon wraps around the button on the front panel to keep the journal closed.


The back of the journal uses the same paper from the first side, again with gloss Modge Podge.  I cut the "journey" sentiment from Graphically Speaking out of chipboard three times, adhered them together with Modge Podge, and then adhered the same word cut in pink.  I blinged it up a bit with some black gems.  The mats are cut from Storybook and the flourish is from Recollections.  This one was several weeks in the making and I really hope she likes it.


Thanks so much for stopping by and I hope you enjoyed this project.  It was several weeks in the making and I am thrilled with the way it turned out. 

Monday, May 30, 2011

My First Hike

I've been out of town and away for almost a week.  I am so thrilled to finally be home!  I feel like I haven't had a chance to be creative lately - at least not for myself.  So I decided I would sit down and work on a project that was all about me today.  I put together a double page layout of my first day hike at Red Top Mountain.  I took my baby girl Lola with me and we had a great time. 


The title "Great Outdoors" was cut from - you guessed it - Graphically Speaking.  Apparently this cartridge and I were meant for each other because I had no idea it had these wonderful outdoor theme sayings and cuts when I started designing this page.  I also cut the circular "Fresh Air" as well as the tree from this cartridge.


The Red Top title was cut using MTC software with a ttf I have installed on my computer.  


The hiker is from Going Places, and I found a place to put both the negative and positive images.  I backed the negative image with a circle cut from Lacey Labels and then matted to a scalloped circle cut using a Spellbinders die.


The sign post is from Everyday Paper Dolls and is an image I have used several times before. It's hard not coming back to our favorites!  I added a picture of the trail sign to it.  I wanted to make sure I could remember exactly where I was when I was on this hike.


Last but not least, the journaling is handwritten on paper cut from Spellbinders Reverse Wonky rectangles.


Thanks for stopping by!!

Tuesday, May 24, 2011

A Wedding Card

I almost forgot the card I made for my husband's Grandmother.  Running a little short on inspiration, this card is based on one that I saw on Mary's Cards TV blog.  It came together very quickly and was really easy to make.  The paper is from a the SEI Black Orchard pack that I have again had for ages.  I have been making an effort to use some of the paper packs that I have had around for a long time.  I really am happy to finally have a use for this one.  The Mr. & Mrs. is cut from the Tie The Knot cartridge.


Thanks for stopping by!!

Monday, May 23, 2011

Another Card

This is another one of my cards I used my Spellbinders lotus die to create.  I adore it.  So much so, I couldn't think of anything I wanted to add to the front.  I ended up deciding on a Congratulations sentiment that I cut from the Gypsy Wanderings cartridge.  The paper is all cut from the DCWV Citrus 8x8 stack.  I am glad that I'm finally able to find some use for it after all this time.  I hope you like it.


Thanks for stopping by.

Sunday, May 22, 2011

Jakob with a Rose

 This is a picture I took of Jakob at his Great-Grandmother's wedding this past weekend.  The rose he is holding is from her bouquet.  He asked her for one of her flowers before the ceremony and she told him she would give him one afterward.  Well, he held her to it - right after the ceremony was over he marched up to her and asked for it and she obliged.  My little man never forgets anything.


You will recognize the design, its the same from the last scrapbook page I did, taken from the Sketches 4 Scraps app I have on my IPhone.  When I fall in love with something I have a hard time letting go of it!   I used different paper, embellishments and flourishes than the first one, but I like this one just as much.


Thanks for stopping by! 

Wednesday, May 18, 2011

Teacher Thank You Cards

Long time no post!  Life has really gotten in the way of my blogging lately and I apologize for anyone who has missed my more regular updates.  Tonight I have some thank you cards I've made for my youngest son's teachers.  This week is his last week of school so I have been scrambling to get them finished.


I found a paper pack at JoAnn's that I really liked because it was primarily blues.  As much as I love my flowers, pinks, greens, and oranges, I realized a while ago having more gender neutral paper would be helpful.   The stamp is from Stampin' Up and the Butterfly is from the Cricut Elegant Cake cartridge.  It is cut twice and pop dotted for dimension.  I also used spellbinders to cut out the stamp and its mat.


The next card features a die that I've had for some time but really haven't worked with much at all yet.  It's the Spellbinders Lotus die.  I absolutely love it!  The additional layered dies are spellbinders as well, but you will have to forgive me because I don't remember their names.  I actually created several cards with the lotus die as the main focal point, but this is the one that ended up as a Thank You card.  I also used a Spellbinders die to cut out the scallop circle that is an off center mat, as well as a EK Success punch to add another layer to the bottom of the card.  The paper is more from the DCVW Citrus stack and the stamp is from Stampin' Up.  I finished  the card off with a little bling in the middle of the lotus flower.  I have very pleased with how it turned out.


 The last card features one of my favorite new embellishments - rolled flowers. I learned how to make these from Capadia's blog.  For those of you who don't know who she is - Diana Capadia is an awesome blogger who features wonderful tutorials on all things Cricut and then some.  This technique is super easy and I really like the look of these flowers.  I will be making more of them in the future!  The heart stamp is another favorite of mine from Papertrey Ink, and the "Thanks" stamp is actually one I picked up at Michael's years ago.  I don't know who the designer is, but I am thankful that I had it.  Lol. 


I appreciate everyone's patience while I was away and as always, thanks for stopping by!!

Related Posts Plugin for WordPress, Blogger...