Hey everyone. I had such a tremendous response to the card I posted on the Cricut messageboard with a flower I made using Flower Shoppe that I decided to do a quick tutorial outlining a few of the things I've learned about using this cartridge. Fair warning - This is going to be a picture heavy post so stick with me! First - these are the three flowers I made this morning that I will walk you through. I love the way they turned out and I love this cartridge so much. There are so many possibilities.
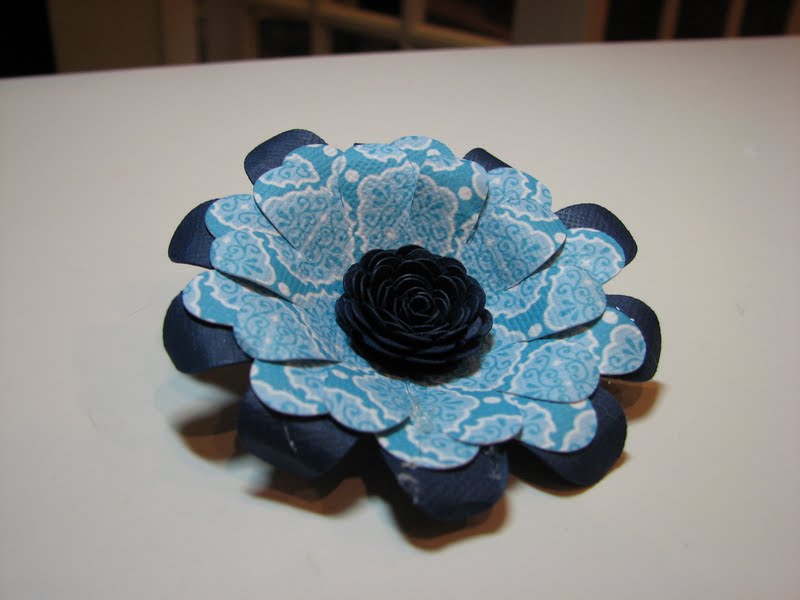
Allright, first things first - starting with the blue flower. I am particularlly partial to dimension so this is a dimensional flower. What I did was cut three dimensional flowers in graduated sizes, and I cut two of the inside flowers as well in different sizes as I wasn't sure which one I wanted to use.
The largest flower was cut at 3.75", the second one at 3.25" and the smallest one at 3.0". The larger inside flower was cut as 3.25" and the smaller one at 2.75". (ignore the white cut out you see on the right! - my camera skills need improvement!)
Putting the flowers together is very easy. First you need to fold up all of your dimensional flowers using the adhesive of your choice. I am sticking with my hot glue gun for the moment, although as my blisters increase in frequency I realize that might have to change. Here are a few pictures after I have glued the layer together.
The next step is making the middle flower. If you are unfamiliar with quilling it is really easy. In fact, these flowers are the only thing I know how to quill!! What you do is start at the outside, put the edge of the paper inside the quilling tool (with the design facing up) and begin wrapping either clockwise or counterclockwise depending on what color you want to show. Since this is double sided solid paper it didn't make a difference and I just have a natural inclination to wrap clockwise so that's what I did.
I apologize for the fuzziness of the photos. For some reason I can't get the Macro on my camera to work correctly lately. Something else to do! Sigh. Here is a shot that I took right after I started wrapping.
Something that is important when you are doing this is keeping the bottom of the flower at the same level. It's okay if the top looks like it is at different heights - the bottom is what you are worried about because that's where it's going to get glued down. It doesn't take terribly long to do this, but if you go slowly and just make sure you keep adjusting to keep it all level at the bottom then when you are done this is what you should have:


This flower is wrapped pretty tight and I think that's the way you should always start - getting it as tight as you can and once you are done and have removed it from your quilling tool you can sort of let it go and let it open up. You can actually adjust it a bit and make it bigger if you want to, but you don't want to unravel it too much, the base needs something to stick too. The flower you see is the larger of the two center flowers I cut out. I cut this at 3.25" and you can see that ultimately, its not that big. We all know that our machines aren't the best at small intricate cuts, so while you can go smaller, keep in mind, the smaller you go, the more difficulty you might have in actually getting a clean cut that you can use.
Here are all of the pieces unassembled. I put it together starting with the largest piece first, and then adding the smaller sizes until I was complete. Once again I prefer hot glue for this type of project because I like things to be *set* and I don't have the patience for the other liquid adhesives to dry.
The last thing I did was curl the edges of the leaves. You can use any tool you have handy to do this. I prefer using an old stylus, but I've seen people do with it pens. Just take the edge of the pedal and wrap it around the tool to give it a little curl. It's super simple, and only takes a moment. Here is the finished product.
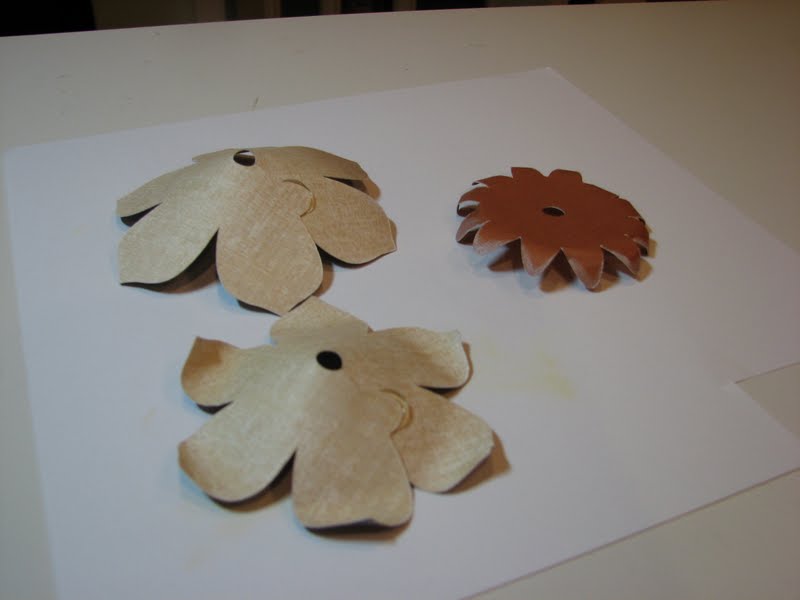
Next up is the brown flower. I really like this one. Here are my base cuts:
The largest pedal is cut at 4", the next size down is 3.5" and the brown flower is cut at 3". The inside flower was cut at 3.75".
You see two flowers in the above picture and that's because I realized I made a mistake during the final flower assembly. If you are making a dimensional flower, then you need to make make sure all of your cuts are the dimensional flowers, even if they are different style flowers. I was trying to mix up the shapes a bit and I initally cut the inside brown flower as the full flower. It just didn't fit in the card, so I went back and cut out the same flower but using the dimensional cut.
Here are the flowers put together (you are still seeing the incorrect middle brown flower here - I didn't replace it until after I took these photos).
More quilling showing how I am keeping the bottom even.
And here is the final product:
Last but not least I decided to make a regular non-dimensional flower that just had a lot of layers. This is the mum flower shape. I cut six of these at 2.64", one at 2.09" and the smallest one is 1.53".
I just mixed up the papers and added a brad to come up with this.
I think that's it. Easy peasy right?! I hope this tutorial was helpful to you. I am a flower nut and this cartridge is right up my alley. A great thing about this cartridge is how it lends itself to using scraps. All of the flowers you see I made using paper I pulled from my scrap drawer! Here are a few additional pictures of all the finished flowers together.
Please, please let me know if you have any questions! As always, thanks for stopping by!!






 Posts
Posts