Showing posts with label Invitation. Show all posts

Monday, October 8, 2012

A Spooky Birthday Party Invitation

My son's birthday is coming up and I've been racking my brain trying to figure out what type of invitations I was going to make him. This is going to be a small party, nothing like the invite the whole class thing we used to do several years ago.  Which is a bit of a relief because I don't have the time or energy to duplicate the invitations that I made for his last big birthday party. A while back I saw these coffin invitations on the Silhouette blog that I thought were absolutely perfect.  So, I scraplifted -heavily!  But I jazzed up the front of the coffin and added a few things here and there.  It took me a little longer than I had hoped to finish them, (my mojo is still fairly low) but I really like them and I think my son is going to have fun handing these out to his buddies.  


Recipe:
Stampin' Up 2012 Halloween Collection; DCWV Dazzle and Glitzy Glitter Stack; K & Company Spooktacular, My Mind's Eye Mischievous
K& Company Tim Coffey Halloween Chipbox (chipboard letters & stars); Spooktacular chipbox
Silhouette:  coffin treat boxes and shapes, Invitations (Print & Cut)

I am sure this party is going to be a blast.  I am looking forward to it and I know my son is as well.  Thanks so much for stopping by today!

Monday, July 4, 2011

Cricut 360 Blog Challenge

Hey everyone!  I am entering my very first challenge.  If you haven't checked it out - take a look at the Cricut 360 blog.  It's brand new and there is a lot of great looking crafting going on already!    The first challenge is to create an invitation using at least one Cricut cut.  Here is my entry:


Recipe:
Paper:  Martha Stewart Crafts
Cartridges:  Elegant Edges, Formal Occasion
Tag:  Spellbinders Ribbon Tag
Ink:  Stampin' Up Daffodil Delight
Ink:  Papertrey Ink

I really liked how this turned out.  I hope the folks over at Cricut 360 like it as well!  Thanks for stopping by!!

Sunday, June 26, 2011

My First Big Craft Project - Baby Shower Invitations for my BFF

Hey everyone!  I know I've been a bit quiet this week but I have a lot going on!  Summer is taking its toll on me.  The kids want attention, attention, attention!  It's great to have them with me though and we've been on several new adventures.  Hopefully I will be able to share some of them with you an upcoming date when I get those pages scrapped.  In the meantime, I wanted to blog about my very first big crafting project.  As many of you know, my BFF Brandy has twins, and last year, I offered to throw her a baby shower.  Of course, in order to outdo myself I decided that I was going to handmake all of the invitations.  She thought I was crazy, but I have a Cricut so I felt confident that I could mass produce something spectacular.  Here are the invitations that I designed.


As you can see from the invitation, Brandy was expecting twins (boy/girl) and she wanted bright, fun colored invitations.  I based the invitation on a Splitcoaststampers tutorial on crisscross cards.  I created a cut file in Design Studio using the George cartridge to create the card, which is actually two pieces that I glued together.


One of my favorite things to do is to make the same design but use slightly different colors and/or papers.  I made the card in four base colors and then alternated the pattern paper that appears on each.  No two invitations are alike, but they are all coordinated by using the same Martha Stewart paper pack.  At the time it was sold at Walmart where I picked four of these babies up for cheap, but as many of you know WalMart doesn't carry the Martha Stewart line any longer.  I recently saw this paper pack being sold in the Martha Stewart isle at Michael's so it is still available for anyone who is interested.  


The "It's a Boy, It's a Girl" circle sentiment was generated on my computer using Word Art.  I printed it on white cardstock and cut it out using a Spellbinder circle die.   The stork, rattle, and baby umbrella were all cut from DCWV glitter paper using the New Arrival cartridge.  I cut the mats out for these embellishments using George. The invitation slides into the holder and the writing was generated using Word and printed on vellum.  I attached it to a white mat and then put it on the other side of several different cuts of the Martha Stewart paper.   


Had I known it at the time, I might have saved myself a lot of design time and trouble by using the crisscross card that is on the Tie The Knot cartridge.  It is identical to the one I made for this project, other than the inside are scalloped shaped.  Here are a few pictures of cars I made using this Cricut cut.


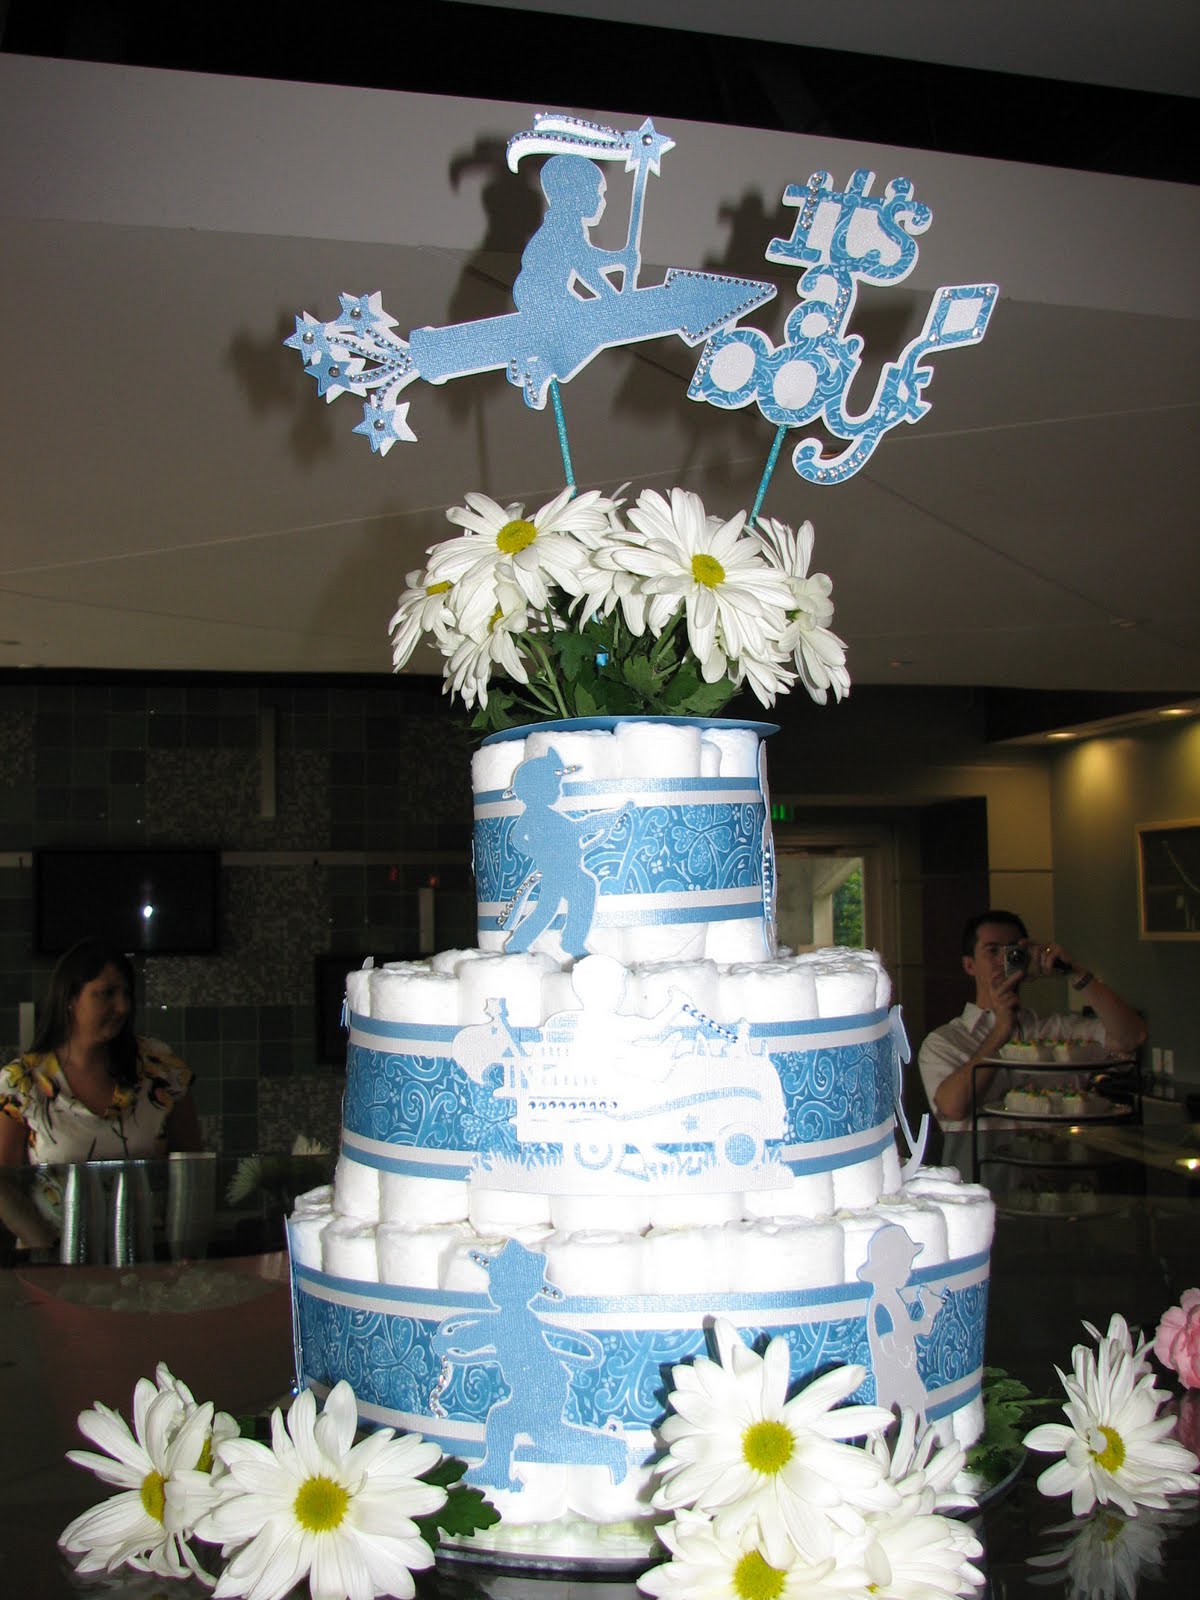
You live and you learn right?  So the next thing I did for this shower was create diaper cakes for the actual shower.  Since Brandy knew she was having a boy and a girl, I decided to make two and make them gender specific. 


The paper I used for each of the bands from Basic Grey and I layered it on top of shimmery Coordinations cardstock.  The images on the bands are from A Child's Year.  They were cut using the same Coordinations paper and blinged out with faux pearls.  We also topped each with fresh flowers and laid flowers around the base of the diaper cakes.  I love the way these turned out. Brandy adored them as well.


My final craft contribution to the shower were the gift boxes.  I used a heart shaped hexagon box created by Denise Hill from PaperPastime.  I used the exact same Martha Stewart paper that I used for the invitations.  I wrapped them with a little ribbon, stamped a "Thank you" sentiment on a small die cut with one of my Spellbinders tags, and Walla! I was done.  Here they are:


So there you have it!  Brandy and the guests loved everything and I really had a ball making it all.  Of course I told her that I will never hand make 50+ invitations again.  She was my first and only!


Thanks for stopping by and please leave me a comment if you like what you see!

Monday, May 9, 2011

Tigger Birthday Invitations

 My youngest son is in a Winnie The Pooh phase.  Which is actually fine with us because it beats Blues Clues and Mickey Mouse.  His birthday is coming up and he has requested a Tigger party.  Of course I had to oblige - these are his birthday parting invitations.


This is a four inch tri-fold card - very easy to make.  I cut Tigger from the Pooh and Friends cartridge.  There are quite a few Spellbinders cuts on the card as well - the outside squares as well as the inside invitation and its matting.  I think they turned out really cute and thankfully they didn't take a long time to make.


Thanks for stopping by!


Edited to Add:  Okay, I must confess - I didn't make these All by myself.  My BFF Brandy was in the house and she is solely responsible for assembling Tigger (which turned out to be a good thing because I was so NOT looking forward to that particular task).  What was I thinking by not mentioning her?  I love her dearly and one of the reasons this project went so quickly is because she came over (on Mother's Day of all days) to help me work on them.  I love her dearly!!  Kisses to the best assembly line woman on the world!!

Thursday, May 5, 2011

Happy Birthday Jakob!

My oldest son Jakob turned seven last fall.  His birthday falls around Halloween and because I was having a creative block, I decided to go the easy route and just make Halloween themed invitations for him.  I used a fold out card I initially saw on CardsTV as a jumping off point, and this is what I came up with.  


Truth be told, these were fairly intricate.  I had several months to work on them, and I was very happy with the way they turned out.  I used pattern papers from DCVW Halloween stacks.  I like the effect of changing up the papers, and colors of the embellishments so that no two invitations look alike.  


Thanks for stopping by!
Related Posts Plugin for WordPress, Blogger...