Tuesday, October 18, 2011

Happy Birthday to Phillip!

I am on fire!  Well, not really, but I did getting quite a bit of crafting done this weekend. My husband's big 5-0 is on Thursday and in honor of  the event, I made this card.

There is a funny story here.  I made this card over the weekend and stored it away.  Yesterday morning my husband went into my card drawer looking for a card for my son's teacher and you guessed it - he gave her his birthday card.  I had scheduled this to post on his birthday but no matter now!  


This card was based on this week's Card Patterns Sketch 137.  I haven't played in this challenge for a while, and I really like this week's sketch so I figured I would go for it.  The paper combination came together a bit slowly.  Since this is a card for my husband I didn't want the paper to be too feminine, but I still wanted to use some color.  I ended up using Stampin' Up paper as the card base (and for a few of the elements), Canvas Corp's Black & Kraft Fresh Words Reverse as the mat, and then a small piece of my favorite My Mind's Eye Stella Rose to draw attention to the center of the card.  I am just loving my crinkly ribbon from My Craft Spot - it's here again in Cranberry.  All of the stamps you see are from Waltzingmouse, other than the sentiment - that's a Papertrey Ink stamp.  The flower is a spellbinders die that I saw recently on their blog and fell in love with.  It's an anemone flower and the set is awesome. I sprayed the entire flower with glimmer mist, added a quilled flower cut using Flower Shoppe to the center, and added some stickles to the edges to make it pop.  I love my flower and I was able to stop myself at just one keeping in mind that I am trying to keep the femininity toned down on this one.  This card is a bit different for me.  My color patterns tend to lean toward the matchy matchy and I like that I've mixed it up here.  And most importantly, I hope my husband likes it.  

Happy Birthday old man!

Recipe:
Paper:  Stampin' Up, Canvas Corp - Black & Kraft Fresh Words Reverse, My Mind's Eye - Stella & Rose
Cartridges:  Flower Shoppe
Spellbinders:  lacey circles, scallop circles, banners & anemone flowers
Ribbon:  Crinkly ribbon from The Craft Spot
Stamps:  Waltzingmouse - faux circles, banners, Papertrey Ink - Happy Birthday
Other embellishments:  Tattered Angels Glimmer Mist & Stickles


Thanks for stopping by!!

Sunday, October 16, 2011

Waltzingmouse No. 69

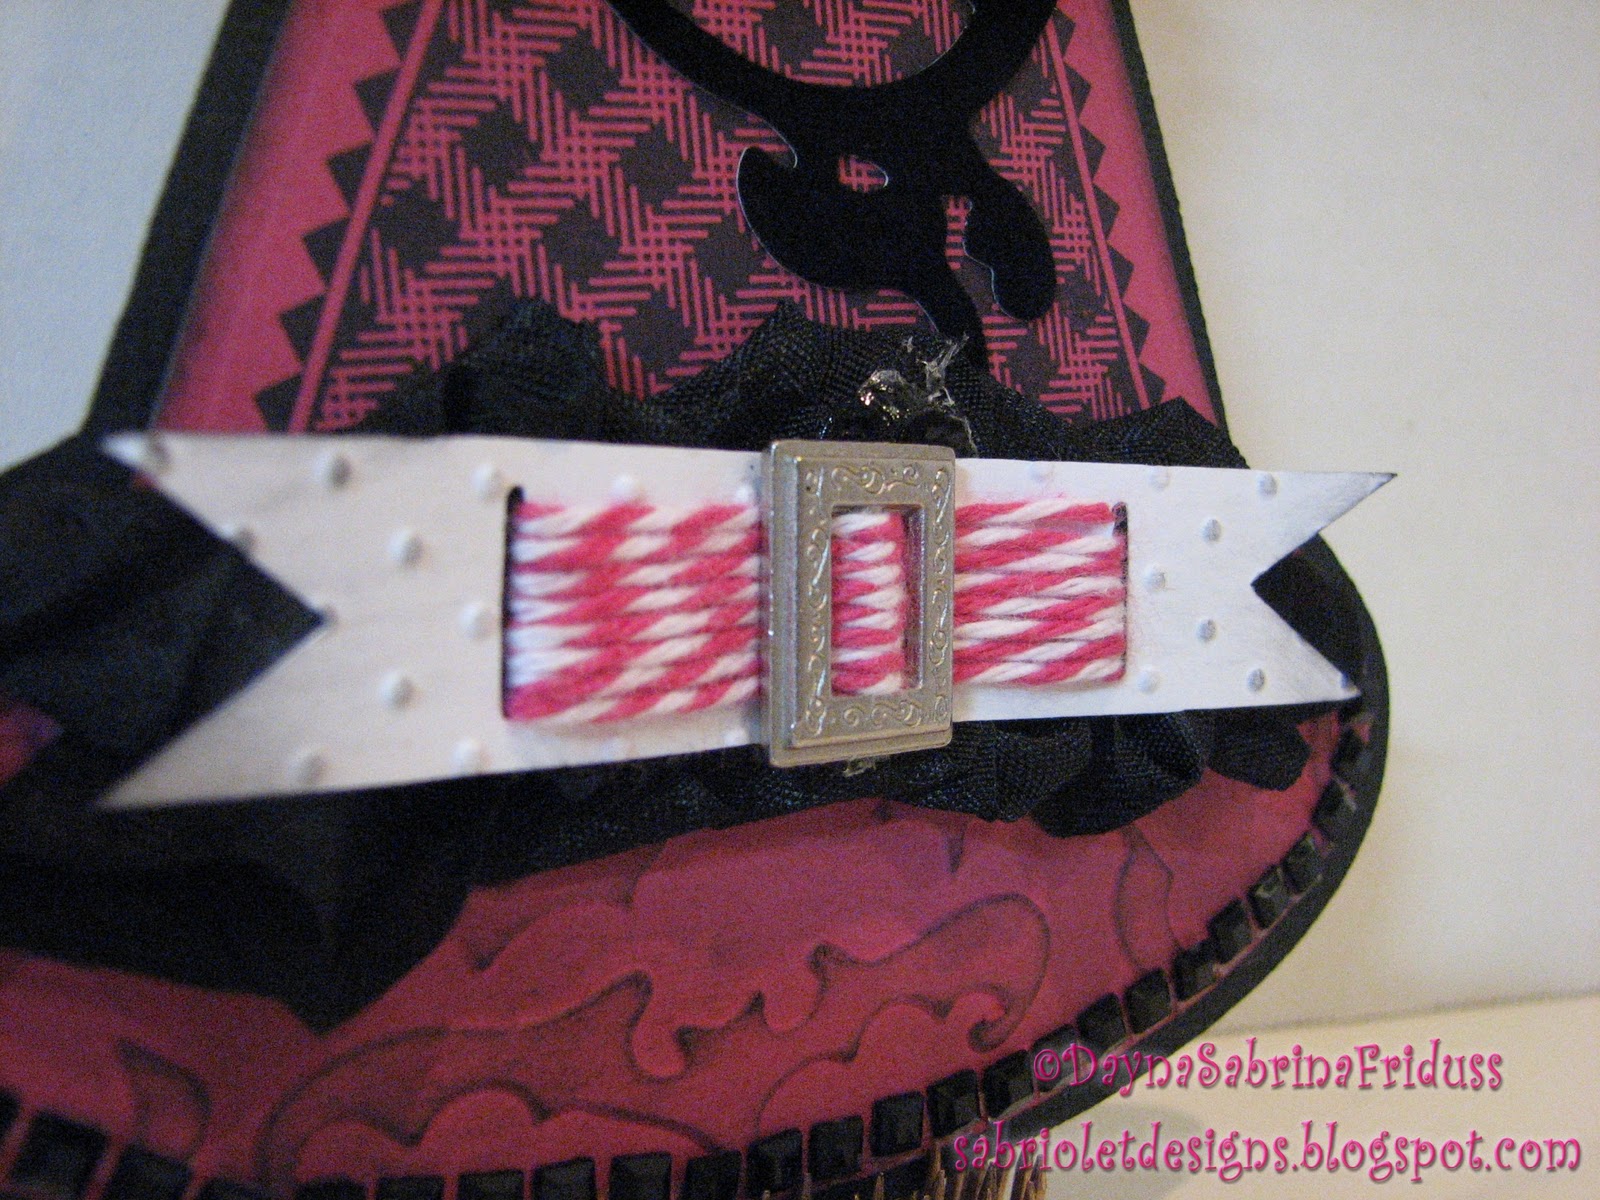
This is going to be a short and quick post.  Here is my entry for this week's Waltzingmouse sketch challenge.  I used my new Waltzingmouse background stamps designed to work with Spellbinder dies in order to make this witch's hat tag.  I added an oval made using Make The Cut. I then added a little crinkly ribbon (I am cleary already addicted to the stuff!), a tag cut using Art Philosophy that is embellished with twine and a buckle.  One more detail - a flocked flourish which gives it a bit more of an elegant touch.  Walla!  Tag complete!  Okay, minor mistake - I got a little happy with the glue gun and there is a little glue residue on the ribbon. Eh, I still like it.  I will Here is the finished product:


Thanks for stopping by today!!

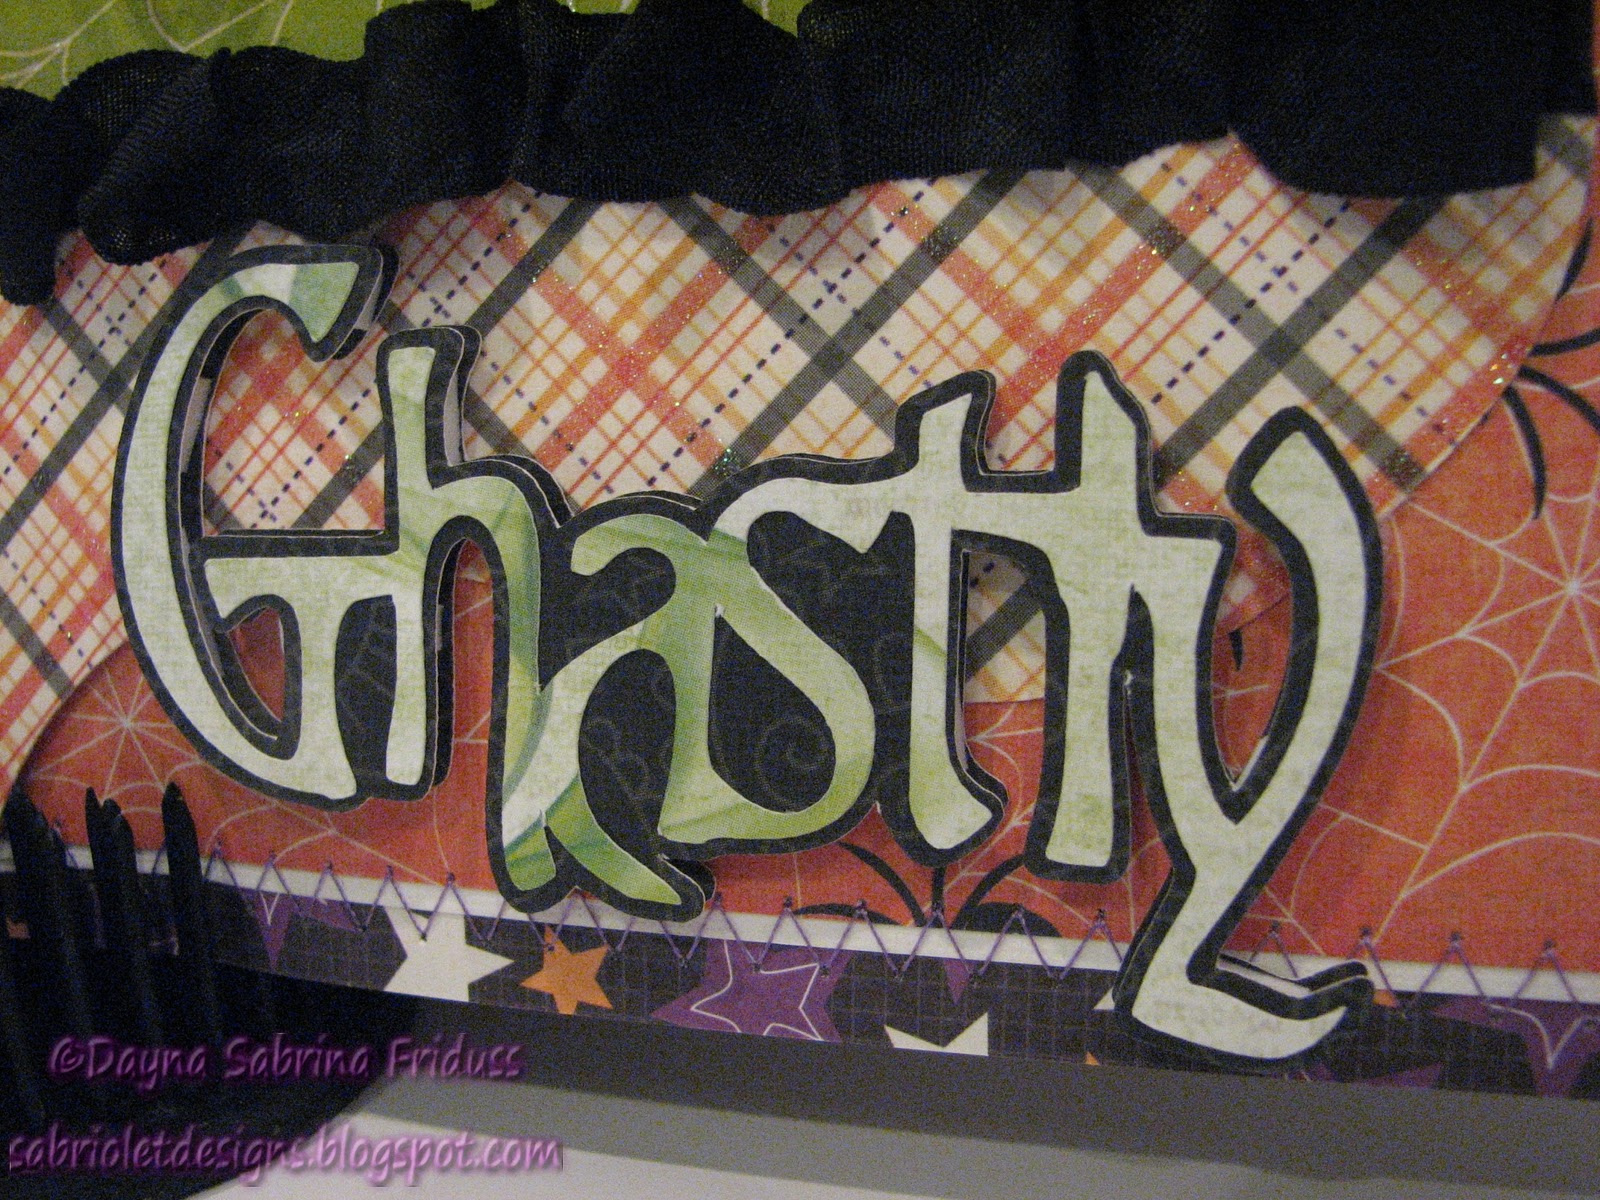
Ghastly It is!!

Halloween is almost here!  My oldest son, after changing his mind three times, has finally settled on a costume for this year.  He is going to be Darth Maul from Star Wars.  And as the costume as ordered this afternoon he knows that this is it - no more changes!!

A few days ago his father took him to McDonald's and they just so happened to be painting faces that evening in honor of the upcoming holiday.  When I arrived home from a late trip that night my little boy was hopping around in his pajamas with this face.  Too cute, so I had to snap a picture or two and scrapbook it.  I do think this is a record for me.  I don't think I've ever had a picture scrapbooked just two days after it was taken.  Wonders never cease in my household!

So a little about this page.  It is again a double page.  I have been doing this for a while now.  I make one for my scrapbook and the other for a book that I am creating for my mother.  I will send it to her as a part of her Christmas present.  She loves these books and carries them with her everywhere she goes for several months after she gets him. She lives over 1200 miles away from us so we don't get to see her often.  It's my way of helping her have a glimpse of her grand kids everyday lives.

The paper comes from two main stacks - DCWV's Midnight Spell (last's year's Halloween stack) and this year's stack (Ghosts & Gobblins).  There are a few other Halloween papers used here and there from several K & Company stacks that I own.  Okay, I'll own it - I have a lot of Halloween paper.  And I bet you do too!


This was a simple layout that only took a few hours.  I normally work from sketches, but I decided to go ahead and wing it for this one!  I started with some basic stitching.  I am addicted to sewing on pages and this page was certainly no exception.  There is a zig zag skitch around the edge of both pages, and then a straight stitch as well on the inside of the first page.  There are five Cricut cartridge cuts here:  The frame and title are from Happy Hauntings, the lamp post is from Heritage, the spider web in the top right is on the October 31st cartridge, and the border at the bottom was cut from Elegant Edges.   I am a big fan of dimension as you know so the lamppost, the frame, and the title are all adhered with pop dots. 


Isn't he a cutie?!


Here is page Number Two:


These lamp posts were a bit non nondescript when I cut them out.  I decided to give them some faux stitching to spice them up a bit and added some bling from my stash.  The ribbon is a lovely touch and believe it or not this is the first time I've used crinkly ribbon which is so popular now.  I ordered mine from Kimberly at My Craft Spot.  This ribbon is absolutely fantastic - so easy to work with, the price was fair and Kimberly shipped it to me within three days.  I think I ordered it this past Wednesday and it arrived in my mailbox today.  Hooray for Kimberly!


Full Recipe:
Paper: DCWV Midnight Spell, Ghosts & Goblins, K & Company Halloween Stacks (2010)
Cartridges:  Happy Hauntings, October 31st, Elegant Edges, Heritage
Spiderweb Punch:  EK Success
Ribbon:  Crinkly Ribbon from My Craft Spot
Bling:  My Stash

Thanks for stopping by and have a wonderful Sunday everyone!!

Saturday, October 15, 2011

So Fresh & So Clean

I've been waiting for the perfect opportunity to play with this Sketch Savvy sketch and finally some great pictures fell into place.   And I have finally gotten back into the doubles frame of mind.  This is actually a double double page layout.  Yes, I know I am clever!  Lol.  As most of my double layouts do, it took several evenings and part of a day to get these finished and I have to say I am happy they are finally done.  I love the way these pages turned out.


All of the paper you see on both sets is from several collections - Basic Grey's "Life of the Party", My Mind's Eye "Lyme Twist" and Echo Park's "Little Boy".  I also used some solid cardstock from my stash and a few sheets of Coredinations paper.  Although there is a banner shape on several of my Cricut cartridges I opted to use Make the Cut to design my banner shapes because of the ease of manipulating them.  I also wanted a shadow behind each one and I didn't feel like spending the time to try to make one with my Gypsy.  The title is also cut out using Make The Cut.  The two fonts you see are Segoe Script (Fresh +) and Shifty Chica II (Clean).  Again, its so easy to make titles with Make the Cut, I rarely do it the other way.  I also added some twine to the top of the banners to do something a little different.  I like the way it looks.


This is page Number two, and it is actually my favorite of the two.  This one is going into my mother's book.  The background paper is My Mind's Eye "Lyme Twist".  The bathtub was cut using the New Arrival cartridge and the bubbles were cut using Graphically Speaking and Mini Monsters.  I was at a loss as how to *make* bubbles so I cut out these bubble shapes, added glossy accents to them and let them sit overnight to dry.  I think my interpretation is fair at best.  Nothing spectacular but I'll take it.  It does add to the pages.  The embossing folder you see is the Cuttlebug large polka dot folder.  I just rant the paper through two times using my Grand Calibur.  Very simple.


Recipe:
Paper:  Basic Grey - Life of the Party, My Mind's Eye - Lyme Twist, Echo Park - Little Boy, Coordinations
Cartridges:  New Arrival, Graphically Speaking, Mini Monsters
Title:  Make The Cut using fonts:  Shifty Chica II, Segoe Script
Twine:  The Twinery; 
Embossing:  Cuttlebug Large Polka Dots folder  


Thanks for stopping by!!

Just Be You


I think the reward for conformity is that everyone likes you except yourself.              ~ Rita Mae Brown

Wednesday, October 12, 2011

Play It Loud Sax Man

Many of my regular followers know my husband plays the saxophone and has been in a band for the last four years or so.  They play gigs around town, private parties, and really, anywhere anyone will have them!  Every year our state bar hosts a band competition where various groups vie for the crowd and judges approval.  It's a charity event, but every single band takes it's so seriously.  It's the perfect setting, because the inside joke is that attorneys are all frustrated musicians.  Anyway, my husband has been lamenting the fact that he's not represented in the current scrapbook I've been filling up so I thought I would finally change that.  Here is a layout I created using a picture taken at the show this past summer.


I used this sketch from sketchabilities.  I've had a bunch of their sketches for a while but just haven't been able to work my pictures into one.  This one worked out well.  The background paper, and paper on the frame is from the Cricut Imagine cartridge Audrey.  I also used a new product I picked up a few weeks ago - Tim Holtz's tissue tape.  I cut the frame out of grunge board, covered it with paper from Audrey, added some strips of tissue tape (very easy to tear and apply), and then used Marshmallow glimmer mist on the entire thing to give it some much needed shine.  I am really happy with the way it turned out.  I also used a bit of Teresa Collins and DCWV paper for the strips on the side, after running them through an EK Success punch.  I looked for a Cricut image that would suit this page, but I just didn't find anything I liked.  All of their musical images were a bit too cutsey and whimsical so I decided to just leave the page stripped down.  I cut the title out using Make the Cut and more paper from Audrey.  I wish I remembered the name of the font and I didn't save the page so I can't go back and tell you.  I have got to stop doing that! Overall, I like the page and Phil seems to like it as well.  He is now properly represented in the family scrapbook.

Thanks for stopping by!
Related Posts Plugin for WordPress, Blogger...