Wednesday, October 31, 2012

Keep Calm and Soldier On featuring DCWV's Heirloom Christmas

Now I know you've seen all the different variations of the "Keep Calm" sayings going around.  Today I'm adding my own.  These are 4 x 4 note cards that I made using DCWV's new Heirloom Christmas stack that should be available at JoAnn stores soon.  I adore little toy soliders, so with the help of my Cameo I transformed these soldiers into a sketch image and then did a quick print and cut.  It's a very simple card design, but one that I think is pretty cute for this holiday season.


Recipe:
Paper:  DCWV Heirloom Christmas
Silhouette:  sketch image of toy soldiers, all mats and shapes
Twine:  The Twinery

Thanks so much for stopping by!

Tuesday, October 30, 2012

Christmas Wish featuring DCWV's Heirloom Christmas

It's about that time . . . Okay, not quite but its getting there.  My Pinterest feed is full of Christmas cards and items and I am starting to get excited about all of the Christmas projects that I have planned.  I have a scrapbook page to share with you today using one of the awesome new DCWV Christmas stacks.  This stack is named Heirloom Christmas and it will be available at JoAnn's very soon.  I pulled out some of my favorite pictures from last Christmas of my boys decorating our tree.  I think this is the first year we've been able to get Wesley to actually do this so it was really special for us.


Paper:  DCWV's Heirloom Christmas
Silhouette:  all shapes and title
Bling:  My Stash

Thanks for stopping by!

Saturday, October 27, 2012

Take What You Need . . . From the Heart

Tired of these yet?  I know, I know.  I run it into the ground before I'm done with it.  I changed it up a little bit today and I like the results.  I hope you do too.


Recipe:
Paper:  My Mind's Eye's Miss Caroline 6 x 6 pad; Canvas Corp Cork Adhesive sheet
Silhouette:  Heart shape mats
Cricut:  Flower shoppe flowers
Spellbinders:  Gromet Tags and Classic Cards
Misc:  Leather Cord & bling from my stash

Thanks for stopping by!

Thursday, October 25, 2012

Baby Shower Bucket

I haven't played with vinyl is sooooooo long!  But I did tonight.  Brandy came over and we decorated a silver bucket that another friend is going to use for a baby shower gift.  It's a boy and apparently the Mom to be is going with a Lion King theme.  I can work with anything safari.  Ha!  Here's what we came up with:


This was such fun to make.  And it only took a few hours.  Brandy is the queen of weeding which is great because I LOATHE doing it.  I am hoping our friend will take a picture when it's all filled up with baby goodness and I can come back and share that with you as well.

Thanks so much for stopping by!

Wednesday, October 24, 2012

Boxes, Boxes and More Boxes

Many of you know I was recently absent from my blog.  What the heck have I been doing?  Reading for one, I couldn't put Scott Westerfeld's Midnighter's trilogy down.  Only to be slightly disappointed when it ended.  Sigh, but that's how it goes.  (here is a link to the first book on Goodreads).  But aside from reading I began working on a ton of boxes for my sister.  She called me last Monday and asked for 92.  Yep, you read that right - 92.  I laughed.  I told her I would cut for a certain amount of time and how ever many that ended up being would be the number she would get.  It ended up being around 50 or so.  Now these boxes are not embellished, or fancified like I would normally do.  There was no time for that!  I could barely get the tags done in time so it is what it is.  I thought I would show them to you anyway.


Now are there 50 boxes in these pictures?  No.  I honestly didn't feel up to trying to stage all of them!  So what you see are a small sampling of what I have been slaving over this past week.  I hope she likes them because I am DONE!

Thanks for stopping by today!

Tuesday, October 23, 2012

Take What You Need Take No. 3 - Redux - Plus a Card Box that I Adore!

Is the title confusing?  I imagine it is.  I put together 
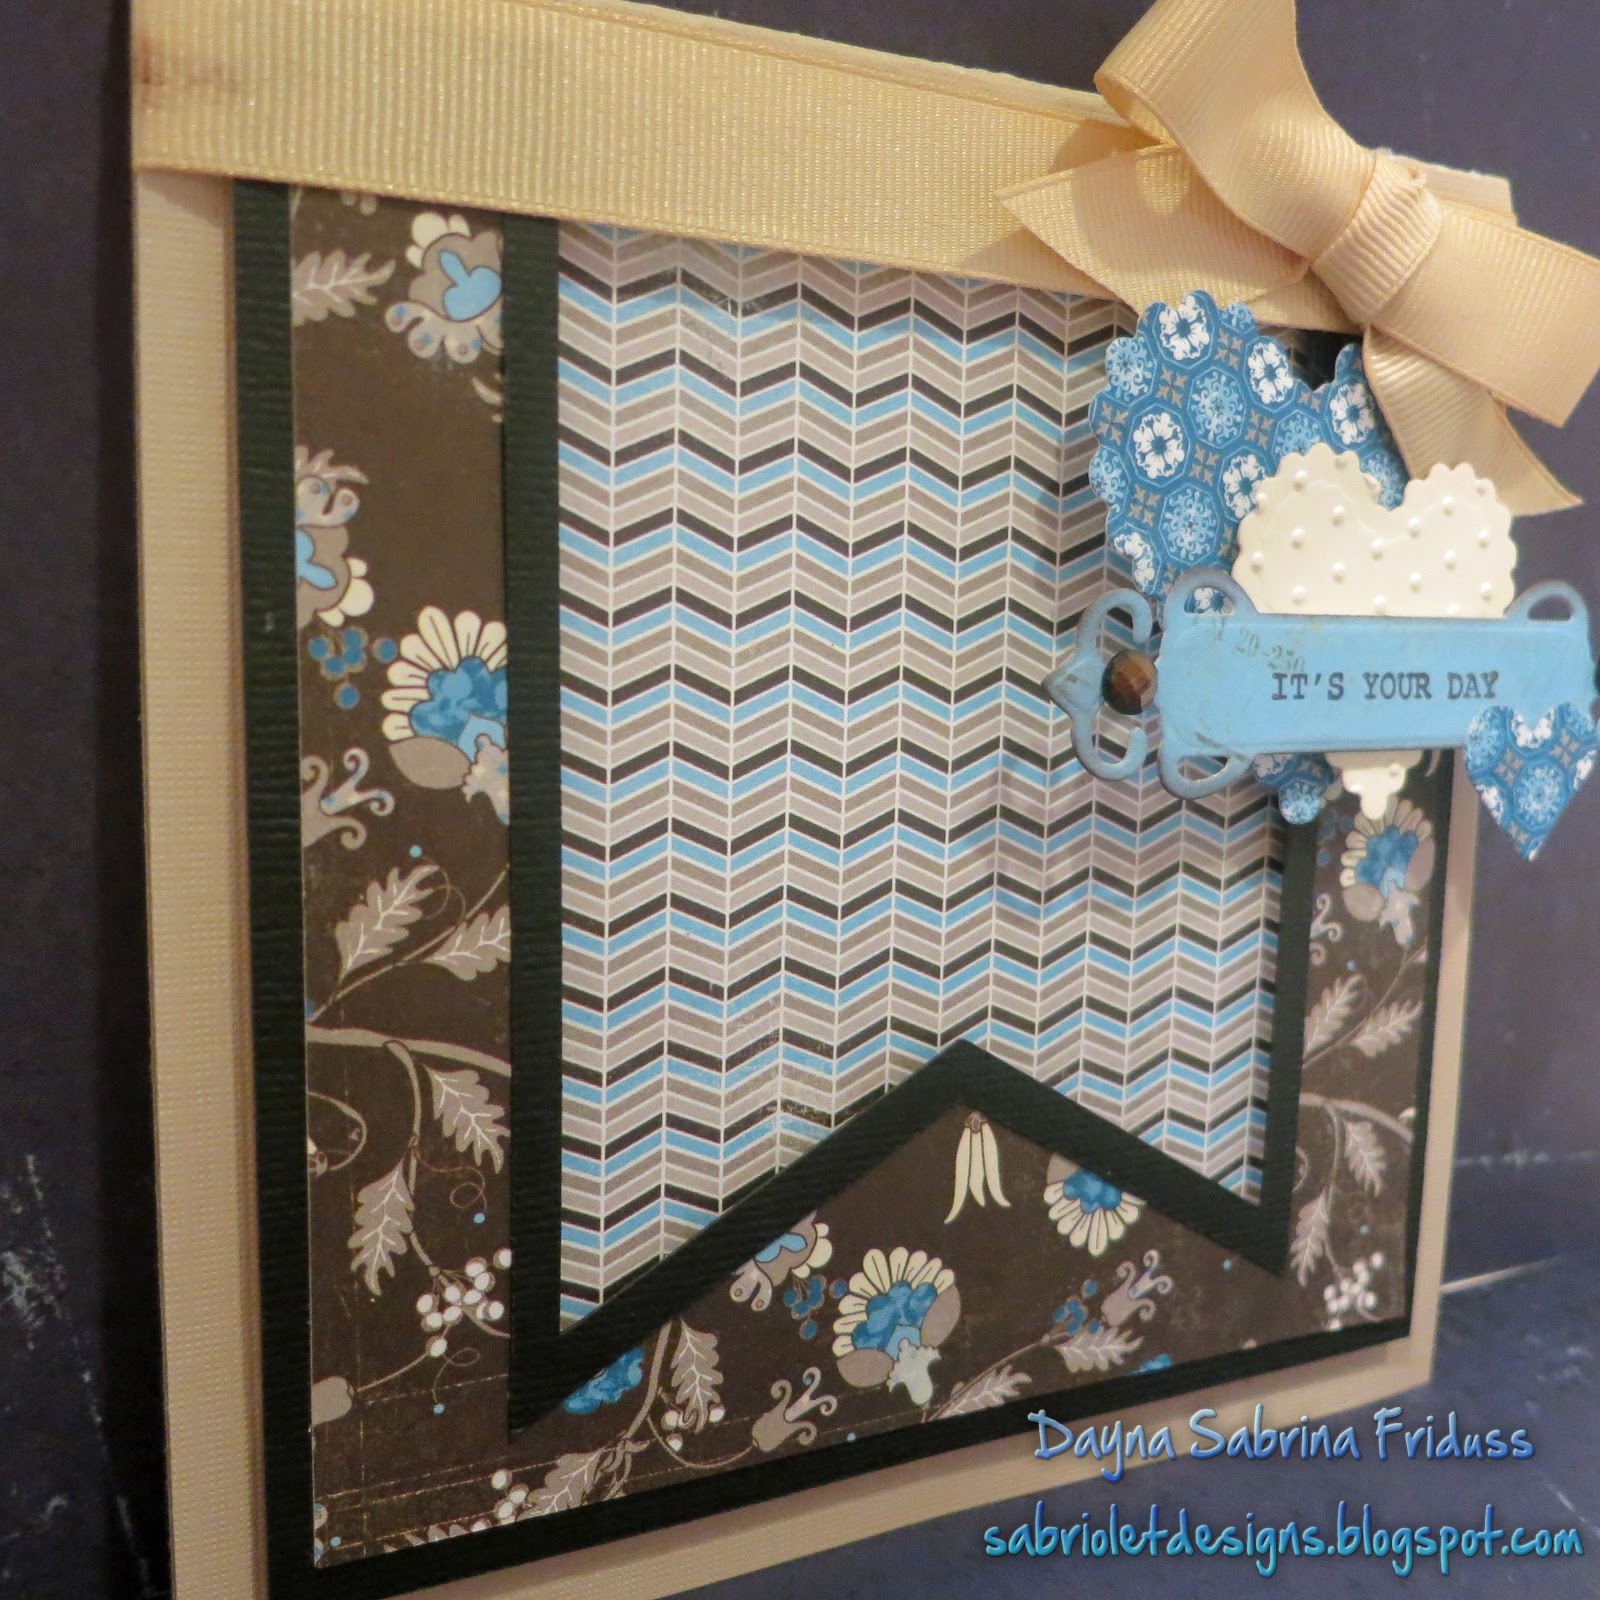
this card for the Cameo Spotlight challenge a few weeks ago.  I wasn't totally 100% happy with it (that's what happens when you're pressed for time occasionally)  and I had also intended it to be a part of a card set.  I got as far as cutting out all of the frames and mats but then had to move on to something else.  So, today I decided to revisit this project and see if I couldn't make something that appeals to me a bit more.

Also, as many of you know, I am nutty about Pinterest.  I came across this post the other night and thought - YES! That's the box I need for my cards.  Turns out this lovely lady wrote up a tutorial and I set my sights on creating a file for the box in the Silhouette studio.  Now I've never attempted anything like this before, but I wanted this box so much I was determined.  I used the wonderful image she posted along with the measurements (I had to convert cm to inches though!) and I was able to pull it off.  I even edited points in the Studio software.  First time ever!  I also want to thank Google translator because I forgot to I mention her blog is in Italian!
Okay, enough jabbering, here they are:


Isn't this box adorable?  Here is a picture of it on my cutting mat.  I used the perforation marks in the Studio so there is absolutely no scoring! Just a few folds, some adhesive on the flaps and this baby is done!  The only downside is that because of it's size I had to use my 12 x 24 mat and also 12 x 24 paper (the box is approximately 15" wide). 


I think I am going to spend some time breaking this up into two images that can be attached.  That way I can use any 12 x 12 cardstock that I happen to have (or want) to use.  I am happily sharing this file (as is - I haven't worked out the 12 x 12 version yet).  If you want to download it - click on the following link to my Public DropBox folder.  You will see the file - right click on it and then you can do a "save as" to the location of your choice on your computer.  I only ask that you don't share the file, please link back to this post if you know someone is interested, and hey - I want to see what you create with it!  Please send me your links and/or pics of your file boxes!

Interested in other free A2 file boxes? Check out 'Tis The Season featuring Artic Wishes.

ETA:  I have finally reworked this box and it's now available in a version that uses one piece of 12 x 12 cardstock.  You can find that file on this post - The Best Is Yet To Come.

Recipe:
Paper:  Recollections Kraft, Coordinations, AC Cardstock (black) and Bazzil (white)
Silhouette:  card box (hooray!), all shapes and print & cut polariod frame
Embossing Folders:  Sixxix, The Paper Studio, Cuttlebug
Spellbinders:  Tags on front of box
Wood embellishments:  Studio Calico

Thanks so much for stopping by today and I hope you enjoy the file!

Monday, October 22, 2012

Autumn Melody cards with a little help from Scor-Pal

Happy Monday everyone!  Three days in a row - it's a charm right?  Today I have a few cards for you that I put together for a cross promotion that DCWV is doing with Scor-Pal.  I don't know what your scoring tool of choice is but I've been using my Scor-Pal since the very beginning.  I think I saw Capadia mention it on her blog and I ran right out and got one.  I was amazed that something so simple could help so make in making cards and boxes.  Lol. Those were the days right?  So today I have three cards to show you that I made using DCWV's Autumn Melody stack.  I added a little scored frame to the center of each card as a focal point.  Here they are:


Pretty cute right?  If you're interested in seeing what else the DCWV Design Team has come up with make sure you stop by the DCWV blog and the Scor-Pal blog all week long.  Everyday there will be something new to see!

Recipe:
Paper:  DCWV's Autumn Melody
Scor Pal:  Scored Center Frame
Flowers:  Prima & my Stash
Spellbinders:  Foliage and Maple leaves
Silhouette:  Mat shapes
Stick Pins: Caroline's Cartagrophy

Thanks so much for stopping by!

Sunday, October 21, 2012

It's Your Day

Hello everyone, I'm back and actually I think I just posted two days in a row.  Surely you jest?!  Yes, I am back for a while and today I have a birthday card to share with you.  I am still head over heals in love with banners. I don't always jump  on the latest trends (and this one has been around a while) but when I do, watch out!  I added some negative space and some embellishments.  The paper is from Authentique's 6 x 6 Journey. I tried to keep the embellishments to a minimum.  The paper is so beautiful I wanted it to speak for itself.


Recipe:
Paper:  Authentique's Journey 6 x 6 paper pad; Stampin' Up Vanilla; DCWV light brown cardstock base
Silhouette:  All mats
Spellbinders:  Fancy Tags, Classic and scallop nested hearts
Stamp:  Stampin' Up
Ribbon:  Papertrey Ink
Bling:  The Paper Studio

Thanks so much for stopping by!

Saturday, October 20, 2012

The Cameo Spotlight No. 6 - Something Spooktacular!

It has indeed been a while hasn't it?  I have been taking it easy, and crafting a few things for Design Teams that I am not able to show you just yet - but stay tuned because they are coming soon.  Today I have a card that I made for this week's Cameo Spotlight challenge.  This week's theme is Halloween!  I absolutely love crafting Halloween items, and I think I read somewhere that it's the biggest seller for paper as far as the paper crafting industry goes.  I know I certainly make my contribution each year! 


Another fun take on this week's challenge is that Jackie has opened it up to other home decor items.  You can submit:  Cards, Tags, Scrapbook Pages, Home Decor, Gift Boxes and Bags, Party Favors and Ornaments.   Also, there is a prize for this week's winner:


Our fantastic prize for the TCS #6 winner is a $25 Gift Certificate from gel-à-tins


For my submission for this week's challenge I kept it simple by making a card, or rather a card and a card set.   I fell in love with the most adorable Halloween digital set that I found at a new place - the Scrap Orchard.  Well, it's not new to many of you digi scrappers, but it's new to me!  My first card is a 5 x 7 but for the set I decided to shrink it back down to A2 size - 4.25 x 5.5.  I plan to have my son use these cards as thank you cards for any presents he gets at his birthday party.


And one final shot of all the cards together!


The digi kit is called Spooktacular and you can find it here at the Scrap Orchard.   Please take the time to stop by The Cameo Spotlight and see what else our wonderful design team has come up with for this week's challenge.

Thanks so much for stopping by!
Related Posts Plugin for WordPress, Blogger...