Saturday, June 30, 2012

Take What You Need Take No. 2

Not terribly long ago I created this card inspired by a picture I saw on Pinterest.  I am still head over heels in love with the concept so I created some quick and easy note cards with this same idea.  I again used my favorite word cloud generator - Tagxedo, and I print and cut the mat using my Cameo.


Years ago I purchased a few pre-made A2 card box sets from DCWV.   In one of my cabinets sat this lovely set of cards.  I'm not sure why I didn't put them to use before now, but I thought they would make a great card base and they do.  This particular set is from the Natural Stack box of cards.

Paper:  DCWV Natural Stack, Natural Stack Box of Cards
Tagxedo:  Word Cloud
Silhouette:  Print & cut word cloud layer and tag
Brads:  My Stash

Thanks so much for stopping by today!

Saturday, June 23, 2012

Happy Birthday Wesley!

My youngest son is going to celebrate a birthday soon.  Instead of making my usual card I wanted to do something a bit different so I made him this cute little gift box.  I am going to fill it with some of his favorite stuff, namely Skittles.  Well not only Skittles, it would take him days to come down from the sugar high given how big this box is.  It measures 4" and this is as big as you will be able to get from a 12 x 12 piece of cardstock.   Happy Birthday Wesley!


Recipe:
Paper:  DCWV Celebration, Doodlin' Around, Snapshot, Dazzle, Creamy Stack, Teenage Dream
Silhouette:  Circus Tent Box, all shapes, rosette, Print & cut tags
Epoxy Stickers Elements - made using DCWV paper - Epiphany Crafts button and sticker maker
Twine:  The Twinery
Embossing Folder:  ProvoCraft Swirls
Font:  Boys R Gross


Thanks for stopping by!

Sunday, June 17, 2012

Happy Father's Day Layouts

Good morning everyone!  Happy Father's Day to all of the fathers out there including my own.  And because of the special day it is, I have a Father's Day layout to share with you guys.  These are pictures that were taken last year on Father's Day.  Unfortunately I was out of town with my youngest son, but my Dad, my husband and my oldest son got together for a short time that day.  And someone took some really good photos!  These are two layouts that I started a long, long, long time ago that I again got *stuck* on.  Brandy pulled these out the other week and we finished them. Now why are there two of them?  Remember last year when I was scrapbooking in doubles?  Yep, these were a part of that adventure - it's been that long.  So I have an extra one!  I think I'm going to put it in a frame and give it to my Dad when we get together later today.  I'm sure he will appreciate it.


And here is Number Two!


Look at that balloon journaling.  That was like, only the second print and cut I did with my Cameo.  Oh my, have I come a long way since then!

Recipe:
Paper:  DCWV Main Street stack
Cricut Cartridges:  Elegant Edges
Silhouette:  Print and cut journaling
Beads and pearls:  My Stash

Thanks for stopping by today!

Saturday, June 16, 2012

Happy Father's Day 2011 . . . A New Music Room

Today I'm posting pictures from an oldie but a goodie that for some reason I've never posted about.  My husband's Father's Day gift last year was a makeover for his music room.  I wish I had *before* pictures for you, but unfortunately they ended up on some disc that's probably sitting in a landfill by accident.  That, or it is hiding somewhere else in my house.  Anyway, the room is very small, maybe 8 x 10 and this is where he practices for his band's gigs.  The room used to have an old stool, an old coffee table, and everything was just spread out all over the floor.

This is what I came up with.

I took these pictures this morning, so it's been almost a year since he *moved back in*.  As much as I would like to take credit for the beautiful saxophone image on the wall, I can't.  I found it on Etsy.  I can't remember the seller's name but if you search saxophone wall art it may come up if its still available.    


Look ma, there's a new stool!  My goal was to keep as much stuff off of the floor as possible, so we put in shelving (as you can see the top shelf is drooping a little, it needs a little repair), and added little bins for him to keep his various things in.  He has a lot of reeds, papers, and well, junk!


I love this table.  It is small, folds out to a desk, and has a wonderful area to store equipment on the bottom.  This is where I actually wanted him to store his saxophones.  That lasted about a week. He just prefers to keep them on the floor in their cases. 


I put two mirrors in this room directly across from each other to help the room look bigger.  I wanted to jazz them up a bit though.  The red one was actually copper when I started. I spray painted the metal  with glossy red spray paint.  I think it looks a bit more rock and roll this way.  The other mirror is a Hobby Lobby find.  I love how it mimics a door, and the hooks were exactly what we needed - again, trying to keep things off the floor!


All of the other vinyl work is mine.  The names of his favorite bands are here and there across the room.  I used MTC to trace images I found on the internet, generated shadows and walla!  So, he really loves this room and it was undoubtedly a labor of love. 

And last but not least, a lava lamp - a Jimmy Hendrix version no less.  Score!


Thanks for stopping by today!

Monday, June 11, 2012

Project Life Week Twenty-Four

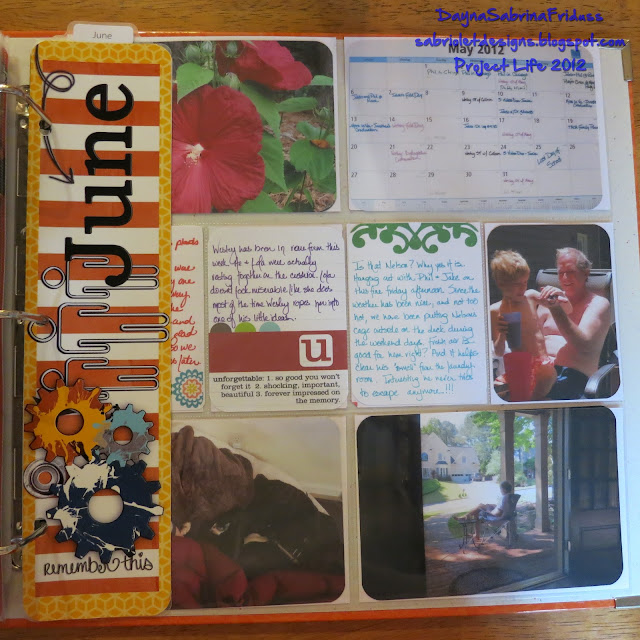
Can you believe it? We are almost halfway through 2012.  And I'm doing very well keeping up at this point.  I feel like I've gotten my second wind with this project.  This week I added digital brushes that Ali Edwards just started selling.  I saw these on a page on her blog and fell in love.  This is a total scraplift, and you can find the original post on her blog here.  As usual, I have several inserts, two 6 x 12 photos of my boys in black and white that I fell in love with, and then another one covering our trip to a local festival this past Sunday.  It's a different page protector, another one from the WRMK variety pack I purchased some time ago.  I really like the different styles, it keeps it all pretty fresh for me.  


I'm sorry about the glare on some of the photographs.  The best way to photography these pages is next to a really sunny window and as its been raining for days (no complaints from me, really) it just wasn't possible tonight.  I am pleased with this week.  Very simple, but again, sometimes less is more.  For those of you who wonder where I get a lot of this inspiration from - check out The Mom Creative's Project Life Tuesday linking up party.  I link up most Tuesdays and find a lot of my inspiration there. 

Thanks so much for stopping by everyone.  I hope you have a fantastic Tuesday!

A Easter Page for Brandy

Brandy was back again today and she wanted to work on putting together a scrapbook page for the twins first Easter.  Now, I am ashamed (a little bit) to admit I have probably have had these pictures for over an year and haven't done anything with them.  Brandy REALLY wanted this done, so I made myself get inspired.  And as usual, once we got going it wasn't so difficult.  Brandy is a great believer in using what you have.  She spent a good deal of time today organizing my "project" bin.  These are cards, die cuts, things that I have started but just never finished, or I've discarded for some reason.  The hope is that one day I will actually use them. And well, today is the day.  A good bit of the die cuts on this page are from that drawer.  She also went through my embellishments bins and found the cute little white picket fence you see (who knows when I purchased that) and a few other items.  I really like this page.  The layout is a bit different than my usual, and I love, the button on the left side.  I actually got the idea from Pinterest - who doesn't love that website?


Recipe:
Paper:  DCWV Spring Fling, K & Company's Citronella
Silhouette:  Title
Spellbinders:  Beaded Ovals
Silhouette:  bunny, baskets, grass and eggs
Flowers:  Recollections & Prima
Misc:  Buttons & twine from my stash

Thanks for stopping by!

Sunday, June 10, 2012

Retro Sketches No. 15

I'm playing again this week at Retro Sketches.  Thanks for my wonderful friend Kymberlee from The Paper Midwife for the beautiful copic colored image.  I used the sketch feature in the Silhouettes Studio software to create the frame and also to generate the shadows (or offsets) behind the little girl.  


Here is the sketch:


And here is my card:


Recipe:
Paper:  Bazzill Basics
Silhouette:  Sketch frame, shadow layers
Ribbon:  My Stash
Stick Pins:  Caroline from Caroline's Cartography


Thanks for stopping by!

Wednesday, June 6, 2012

Happy Father's Day - Mojo Monday No. 244

This is going to be quick post as it's been a long day!  I used this week's Mojo Monday sketch to create my husband's Father's Day Card.  So now I am all caught up, well actually ahead of schedule.  I so appreciate not having to create cards last minute.  Here is the sketch:

And here is my card:


Recipe:
Paper:  Echo Park's Times and Seasons, Stampin' Up
Silhouette:  all shapes, and print and cut circle
Ribbon:  Stampin' Up
Flowers:  Recollections

Thanks for stopping by!

Tuesday, June 5, 2012

Project Life Week Twenty-Three

Yep, still caught up.  It's actually been a while since I finished a week right when the week ends.  It feels, very good.  I accomplished this by doing a bit of a back to basics approach - no wild embellishments or photo collages.  Just pictures and journaling.  I might be back to this mode of Project Life for a while.  As I was finishing up this past week I realized that the inevitable happened, I have filled up one entire binder.  I was hoping to stretch it out until the end of June so I could separate the year right down the middle, but the album had become too un-managable.  So you are seeing the very last week in Volume I of 2012.  Volume II begins next week.  


So this is the end of the album.  I printed a digital page from the amber edition and just cut it up in sections for the back page with a note - turn to Volume 2!


I finally got around to making the album labels.  Volume 1 & 2.  I used the Amber edition digital paper and did a quick print and cut with my Cameo.


Thanks so much for stopping by!
Related Posts Plugin for WordPress, Blogger...