Today I am guest designing on a fabulous blog Paper Craft Weekend Challenge. I have to thank my good friends Caroline and Allison for giving me the opportunity to be a guest designer this Sunday, the day before the ghosts, ghouls and goblins go walking in your neighborhood in search of candy, candy and even more candy! So, with a Halloween theme in mind, I have a few projects to share with you and of course I am ready to present this week's challenge:
Frames
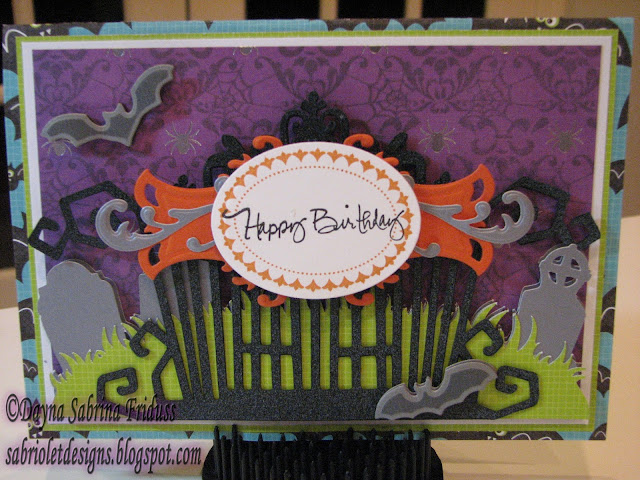
I created two cards using frames to create a focal point. The first card's frame can be found on the Happy Hauntings cartridge, and just to prove that you can still create something Halloween themed without a Halloween cartridge, I used a frame from the Circle exclusive cartridge Sophie for the second card.
Now those of you who know me know that I am a big fan of dimension. I mean it's difficult for me to create any project where every piece of paper or embellishment is laying flat on the paper. I can't begin to tell you how many pop dots and dimensionals I have purchased over the last year. I would be lost without them. That being said, one of the best ways to create dimension is to cut out several frames and put some dimension in-between each layer. I did this on both of these cards, and it certainly makes the focal point stand out that much more.
I am someone who hates for the inside of cards to be bare so I cut out a few layers and added some stamps. Again I used Elegant Edges and Art Philosophy for a few of the mats and all of the stamps are from Papertrey Ink's Halloween tags collection.
My son's birthday party is today. Thankfully it's not the big production that it was last year, it's just going to be family and a few friends. I decided to make up a few quick pillow boxes for the few friends he has coming - and his little brother of course who refuses to be left out. The pillow box image is from Easter 2010. You can find numerous ones on different Cricut cartridges. I prefer this one because it's easy to fold down in my opinion. I used images from October 31st, Happy Hauntings, and Wrap It Up to cut out a Halloween themed image that I covered with a clear page protector from the inside. And then I framed each of the images using an Elegant Edges frame. The back of the pillow boxes has a band that I cut using Paper Lace 2.
And that's it. Okay, maybe not - there's a little blog candy to go along with this post. I am an avid fan and collector of Spellbinder dies. I have one new set of Spellbinders Snowflake dies up for grabs - just in time for your Christmas or winter themed projects! For those of you unfamiliar with Spellbinders, you can easily use them in most die cutting machines, including Big Shots and Cuttlebugs. Here is a picture of the dies:
Recipe:
Paper: K & Company Kelley Panacci, Kraft Spooky Words, DCWV Blossoms & Butterflies, DCWV Ghost & Gobblins
Cartridges: Easter 2010, Happy Hauntings, Elegant Edges, Sophie, Art Philosophy, Wrap It Up, Paper Lace 2
Spellbinders: Ornate Artisian Tags & Accents
Stamps: Papertrey Ink Halloween Tags
Bling: Imaginesence, White & Black Enamel Accents, Martha Stewart glitter
As always, thanks for stopping by!


