So here goes - I love putting vinyl on picture frames. There is just something special to me about words attached to photos. The boys had their first professional photo session together a few months back and I couldn't have been happier with the results. I framed one of my favorite pictures for my mother, and added some vinyl lettering and gave it to her as a Christmas present. I've been meaning to do a duplicate for my wonderful mother-in-law but life, and other craft projects has been getting in the way. I finally made myself sit down and get it done this past Friday.
I started with a floating picture frame that I picked up at Target. I really like floating frames because they are a bit easier to work with.
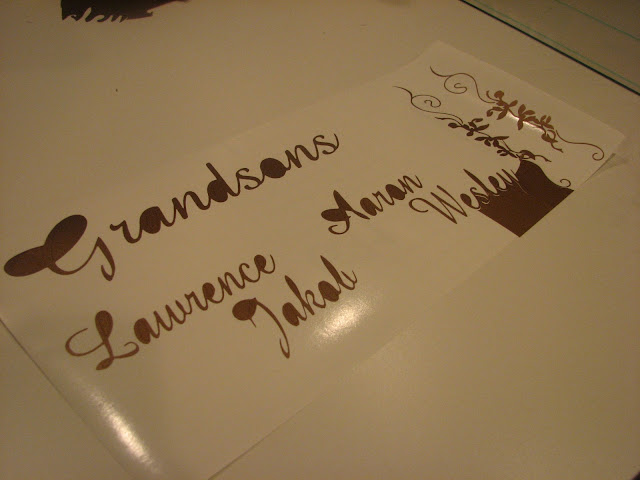
What would normally happen next is that I would measure the inside of the frame with the picture inside to figure out what my available space is. Because I have already made this exact project before, all of the design work was already done. I just pulled up the file in my Make The Cut software and cut it out. This is what the design looks like on my computer.
I cut it out using one of my favorite colors of vinyl - Copper. Cutting vinyl is a bit different than cutting cardstock or regular paper. I have to do something called *kiss* cutting. I need the machine to cut through the vinyl but not the backing the vinyl is sticking to. Every machine is different, but I've figured out which settings work well with my baby to get the job done.
The next step is a process called weeding. I remove everything but the cut out images. This is an in-progress photo.
The next thing I like to do is double check my measurements for each image. Using a washable marker (Crayola) I draw on the glass (the opposite side the vinyl will be adhered to) so I know exactly where to place every piece.
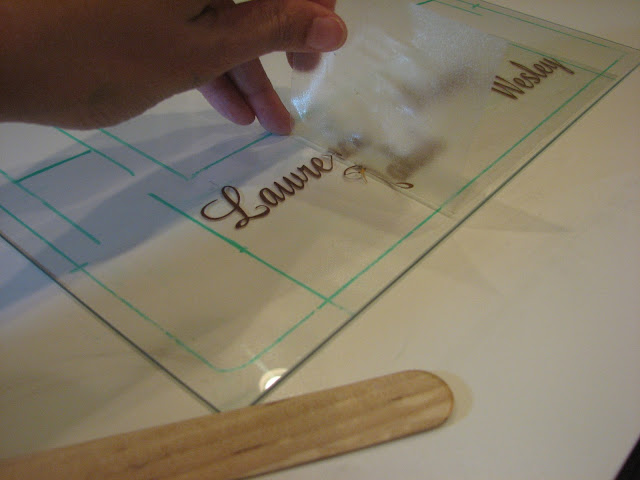
Next up is transfer tape. I lay it carefully on the vinyl and then rub it down making sure it sticks to the vinyl. Then, lifting slowly, the vinyl should come off of its backing and onto the transfer tape.
The rest is pretty easy - placing the vinyl on the glass, and then using my super high tech tool - a popsicle stick - to make sure the letters stick to the glass. Then I carefully (which means very, very, slowly) pull the transfer tape off the glass.
From here on out it's a breeze. I clean up the glass on both sides, add the picture and put it back in the frame.
Here she is all done hanging on the wall. My mother-in-law arrived right as I was taking this photo and immediately confiscated her gift. I'm sure it's already hanging in its new home.
From start to finish this probably took about 45 minutes. So I really have no excuse for not getting Grammy's frame done sooner. Thankfully she's so happy with it that she's not annoyed with me any longer.
Thanks again for stopping by!


This is amazing! The finished result is so flawless. I now want to find vinyl things in my area. I'm not so sure how thrilled Matt will be!!
ReplyDeleteThanks Jen. Vinyl can be addicting so he better watch out. Pretty soon no surface in your house will be safe. Lol.
ReplyDeleteI love this!!!! Thanks for sharing this great idea!
ReplyDeleteWow! That is so beautiful! Thanks for the lesson!
ReplyDeleteI just found your blog, thanks to the card that was posted on Cricut Chirp. Your work is amazing. I don't have much time to craft and get on the computer. But I just wanted to say thanks for sharing and I love your work and thanks for all the instructions as well. You are a true artist! Keep up the good work!
ReplyDeleteThank you Jules! I appreciate the complments!
ReplyDelete